Monday, July 25, 2011

Grounded in Gratitude

A few years ago I wrote an article called Finding Contentment about a gratitude practice I like to do. Today, I read an article by Frank Jude Boccio which talks about this and more. Here's a little excerpt:

On the surface, gratitude appears to arise from a sense that you're indebted to another person for taking care of you in some way, but looking deeper, you'll see that the feeling is actually a heightened awareness of your connection to everything else. Gratitude flows when you break out of the small, self-centered point of view—with its ferocious expectations and demands—and appreciate that through the labors and intentions and even the simple existence of an inconceivably large number of people, weather patterns, chemical reactions, and the like, you have been given the miracle of your life, with all the goodness in it today.

If this speaks to you and you want to read the rest of the article, visit Yoga Journal.

Monday, July 18, 2011

Yin Style Reclining Hero's Pose ~ Supta Virasana

Enjoy Yin Style Hero's Pose

Restorative style Virasana, as explored in the previous post, is a great place to start lengthening your quads. But at some point your body may be open enough to try Yin style Virasana, known as Saddle Pose. One of the beautiful things about Yin is that there is not a huge need for props like there is with Restorative. But still, there is some prep work involved.

Setting up for the pose:
For this version of Virasana, I like to start by laying on my back. Some folks are limber enough to sit on their shins with their bottoms on the floor and then lay themselves down backward but for most folks that is a bit much to start with.

Coming into the pose:
So, laying on your back, roll a bit to one side, bend your top leg's knee and pull that foot toward your bum. Try to roll back to the floor. This is Half Saddle or Half Reclining Hero's Pose.


As you linger here, you may find yourself wanting to pull your other leg in and open like so:


If these both seem crazy but you want a bit more stretch than the Restorative style Hero's Pose is giving you, then I recommend trying Supported Bridge Pose with a quad stretch:

This is nearly the same effect, as far as stretching the quads, but it gives you more space to tuck the foot towards the same side hip since the bum is off the floor. You can turn the foot under (toes point toward the same side shoulder) or you can draw the ankle toward you and keep the toes pointing away. Do one side at a time and try to maintain good alignment: shoulder, hip, knee in the same line. This video by Kira Ryder details the process.

While in the pose:
Keep breathing, keep observing the pose in your body, and allow the body to open at its own rate. Commit to the stillness but do allow yourself to adjust your body as you settle deeper in. Breath into any places where you habitually grip and try to soften. Stay as long as you are comfortable.

Coming out of the pose:
If you are in Supported Bridge Pose, lift your bottom, slide the block out from under you and come to rest on the floor. If you are already on the floor, roll to one side slightly and untuck one foot and then the other. If you were practicing 1/2 Hero's take the 2nd side. After the second side you can be done or you could try the full version of the pose. Take a few sacrum circles and then Little Bridge Pose to bring back stability.

This posture was super hard for me at first. I thought I had knee trouble but it turned out it was just tight quads. After a few months of practicing this posture regularly - starting with the Restorative style supported Hero's and eventually working to the Yin style Hero's - my knee discomfort has gone away.

Monday, July 11, 2011

Supported Reclining Hero's Pose ~ Supta Virasana

Enjoy Supported Reclining Hero's Pose

Hero's Pose can be a very tricky posture to come into for anyone with knee issues, tight quads or low back/SI joint problems. Luckily, with props, this posture can be made available to most people--comfortably--not just to "get through it."

Setting up for the pose:
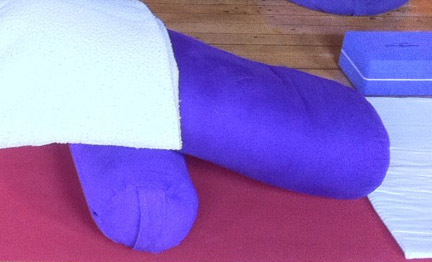
Gather a number of different props: a few pillows/bolsters, a few blankets, and a couple of blocks. Test your ability to sit on your shins with your bum on the floor between your feet. If this does not happen for you in an upright, seated position, it is not going to happen in the reclining version either. You need support.

Set up a bolster or a thickly-rolled blanket behind you lengthwise. Place a block, bolster, or additional pillows under the end of the bolster where your head is going to lay to create a ramp set-up. Like so:

This bolster set-up is good for Reclining Hero's Pose or for Reclining Bound Angle.

Coming into the pose:
Sit in Dandasana (sit on your bum with legs straight) in front of your bolster ramp. Get very close to your props - let your back body touch the bolster. Bend one leg and tuck your foot by your outer hip. Carefully lower your body toward your bolster ramp, coming into Supported Reclining Half Hero's Pose.


If this feels ok and you want to go for full Supported Reclining Hero's Pose, come back to seated and tuck your other foot next to your other hip and repeat the careful laying down process.


If your knees are saying "NO WAY" then you need more propping. Give yourself something to sit on - like a folded blanket or a small bolster and make your bolster ramp higher. With these modifications, most folks should be able to do this pose. I've only ever had one student who absolutely could not do it.

While in the pose:
Keep breathing, keep observing the pose in your body, and allow the body to open at its own rate. Commit to the stillness but do allow yourself to adjust your props and your body as you settle deeper in. Notice if you are gripping the knees, quads, hips or back (or of course the usual places like the jaw, forehead or shoulders). Try to let these parts soften. Stay as long as you are comfortable.

Coming out of the pose:
To come up, support the torso with the hands on the floor, and either push yourself to a seated Hero's Pose or roll to one side slightly and untuck your feet, one at a time. If you were practicing 1/2 Hero's take the 2nd side. After the second side you can be done or you could try the full version of the pose.

This posture is great for creating length in the quads. There may be discomfort in the knees to start but by lengthening the quads this problem can go away - at least for me it did. However, if the knee discomfort is sharp, stabbing or causes you to hold your breath, I would recommend doing this pose only with supervision.

Happy Exploring!

Monday, July 4, 2011

Do Restorative News

I've got a number of schedule updates for the week of July 4-11. Here goes...

1. As stated in my previous post, Do Restorative Yoga is finally on Facebook. Come on over and "like" the page to get updates on the newest postings, upcoming events, schedule, reviews and more.

2. No class at Maurices on Thursday, July 7th due to Sidewalk Sales. We will resume normal schedule on Tuesday the 12th.

3. I'm subbing for Kristin's Vinyasa class on Thursday, July 7th at Yoga North: 5:30-6:30 pm. I know I'm not Vinyasa trained but I know how to do Hatha Flow so I think it will go ok.

4. I'll be teaching a Yin yoga class at 3 pm at the Twin Port Bridge Festival on Saturday, July 9th. Lot's of great stuff going on down at Bayfront for this fest: music, yoga, kids activities, motivational speakers, snacks, great lake views and more. Visit Laughingstock Design for more details.

5. I'll be subbing for Dorothy at the Duluth YMCA on Monday, July 11th for the 5-6 pm class. I will probably teach a combo class - Therapeutic and Yin.

Hope everyone has had a fun-filled 4th of July weekend.

Friday, July 1, 2011

Finally on Facebook

Do Restorative Yoga is finally on Facebook. Come on over and "like" the page to get updates on the newest postings, upcoming events, schedule, reviews and more.

See you there.

Monday, June 27, 2011

Supported Reclining Bound Angle

Blanket-foot Bound Angle

I've detailed other versions of Bound Angle and Reclining Bound Angle before (here and here). But this version is one of my favorites. It's easy to do at home or at yoga class. All you need are two medium-thick or thick blankets (three if you want one more to cover up with).

Setting up for the pose:
Roll one of your blankets into a small bolster and place it behind you lengthwise. It should be long enough to support your whole torso and your head. The blanket roll should be right up against your sacrum and when you lay on it your head should not be hanging off the end.

Fold your second blanket into a hotdog fold (fold in half lengthwise) and lay it down at the end of your mat by your feet (perpendicular to your mat).

Coming into the pose:
Sit in front of your bolster-rolled blanket with bent knees and your feet on your hotdog folded blanket. Fold the "hotdog folded" blanket over your feet making a "foot sandwich." (Now your blanket is folded twice, lengthwise, with your feet inside).


Pull the ends of your foot blanket toward you, tucking the feet in snugly.


Lay down on your bolster-rolled blanket and get comfortable. Your behind should be on the floor but the rest of your back and your head should be on the blanket roll. Let your knees fall open to the sides, tucking the ends of your "foot sandwich" blanket under your knees and/or hips to support the bound angle opening.


While in the pose:
You can experiment with what feels the best to you. If your head is tipped way back or you feel unsupported in the neck, place a folded blanket under the head and neck - not so thick that your head tips forward. Your head should be level with the body or slightly tipped back.

If your inner thighs feel too stretched, wad up your support blanket a little more and give your knees more height.

Send your arms out to the sides, palms up to encourage the heart center to open. If you feel too much pulling across the chest or through the arms, put a folded towel or blanket under each lower arm, supporting all the way to the fingertips.

If any other place in your body feels uncomfortable or unsupported, experiment with more props until you feel at ease.

Keep breathing, keep observing the pose in your body, and allow the body to open at its own rate. Commit to the stillness but do allow yourself to adjust your props and your body as you settle deeper in.

Coming out of the pose:
To come out, you can either help the knees come back together or you can send your legs straight out to stretch. Either way, roll to one side to rest before coming back to seated. A nice follow-up pose is a Supported Side Reclining Twist.

Enjoy!

Monday, June 20, 2011

DVD Review ~ Yoga for Morning, Noon & Night

Yoga for Morning, Noon & Night features Jason Crandell, a contributing editor for Yoga Journal who also teaches at YJ conferences and leads workshops and retreats around the world.

This DVD includes three yoga sequences of about 20 minutes each - perfect for sneaking a bit of yoga into your day, even on a busy day.

The first practice is a gentle wake up session featuring Half Sun Salutations (Sun Breath) plus a nice shoulder opener, side bends, and core strengtheners. I loved the pace Crandell led. I felt very taken care of.

The second practice picks up the pace a bit, using Sun Salutation A, standing poses and back bends. Even though the practice was more vigorous  than the first one, I never felt rushed. I was able to keep my breath deep, smooth and steady. In a faster paced class I think it is easy to forget your breath but Crandell did not let us do that. Maintaining relaxation and breath awareness during a flowing practice is something I really appreciate.

The third practice took us down to the floor for seated and supine poses. Mostly we worked on hip and hamstring openers plus twists and back bends - with a few down dogs thrown in there as decompression after back bends. I felt very relaxed after this practice.

Over all I enjoyed this DVD quite a bit. Crandell's voice was soothing, his pace (even in the faster paced session) was spacious, and I appreciate his emphasis on paying attention to your body and not pushing yourself beyond your edge.

I watched his interview after the three sequences were over and found out that he had had a serious back injury in the past. Perhaps this is why I felt so comfortable with his teaching: he knows what it is like to be in pain and does not want his students to ever go to that place.