Showing posts with label Restorative Yoga Poses. Show all posts

Monday, February 3, 2014

Family Restorative Yoga

I found a lovely blog which features family restorative poses along with lots of other good info. I wanted to feature some of the pics here. The below are my favs from the blog Family Restorative Yoga...

From the post How I beat my addiction to adrenaline.

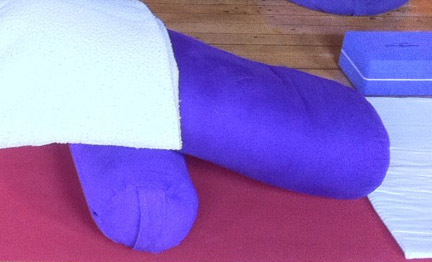
Restorative Stretch supported with pillows

This is as easy as it looks. Stack pillows higher for tighter hamstrings and lower for more flexible and open legs.  Rest head on top of hands to allow space for breathing (as shown), or turn head to one side.


From the post Running on Empty

"Restorative Bridge Pose" - Septhu Bandasana

This brings the tank up to half full.  We stacked pillows under our tushies, bent our knees, and let our upper bodies relax on the floor.


From the post Your Moments of Zen

Yaara's Improvised Legs up the Wall pose...up a comfy chair (Viparitta Korani


From the post Life Pie

(Supported) Supta Badha Konasana

In this pose, we make our legs into a diamond pose.  You may find that it is easy to do this pose without adding support under the knees, however, I encourage you to add the support because it feels really nice to have your knees "held" in this pose.  We put our heads next to each other so we can listen to each other breathing.  This is a very special action - most likely there aren't many other people in your life besides your family whose breath you listen to.


Contributing author, Ellie Klein says: I'm so happy to be able to contribute to www.dorestorativeyoga.com.  You can find out more about me by reading my blog at www.familyrestore.com.  My blog teaches families how to do restorative yoga together!  I am a 200-hour certified Iyengar-style yoga teacher with six years of studio and university teaching experience. In 2012, I completed an extra certification in restorative yoga and have been teaching in this capacity, as well. The focus of my yoga educating centers on families, calm, and interpersonal health. I am available for consultation and yoga education (individuals and groups) in the bay area. To contact me, email klein.elinor@gmail.com.

Monday, July 18, 2011

Yin Style Reclining Hero's Pose ~ Supta Virasana

Enjoy Yin Style Hero's Pose

Restorative style Virasana, as explored in the previous post, is a great place to start lengthening your quads. But at some point your body may be open enough to try Yin style Virasana, known as Saddle Pose. One of the beautiful things about Yin is that there is not a huge need for props like there is with Restorative. But still, there is some prep work involved.

Setting up for the pose:
For this version of Virasana, I like to start by laying on my back. Some folks are limber enough to sit on their shins with their bottoms on the floor and then lay themselves down backward but for most folks that is a bit much to start with.

Coming into the pose:
So, laying on your back, roll a bit to one side, bend your top leg's knee and pull that foot toward your bum. Try to roll back to the floor. This is Half Saddle or Half Reclining Hero's Pose.


As you linger here, you may find yourself wanting to pull your other leg in and open like so:


If these both seem crazy but you want a bit more stretch than the Restorative style Hero's Pose is giving you, then I recommend trying Supported Bridge Pose with a quad stretch:

This is nearly the same effect, as far as stretching the quads, but it gives you more space to tuck the foot towards the same side hip since the bum is off the floor. You can turn the foot under (toes point toward the same side shoulder) or you can draw the ankle toward you and keep the toes pointing away. Do one side at a time and try to maintain good alignment: shoulder, hip, knee in the same line. This video by Kira Ryder details the process.

While in the pose:
Keep breathing, keep observing the pose in your body, and allow the body to open at its own rate. Commit to the stillness but do allow yourself to adjust your body as you settle deeper in. Breath into any places where you habitually grip and try to soften. Stay as long as you are comfortable.

Coming out of the pose:
If you are in Supported Bridge Pose, lift your bottom, slide the block out from under you and come to rest on the floor. If you are already on the floor, roll to one side slightly and untuck one foot and then the other. If you were practicing 1/2 Hero's take the 2nd side. After the second side you can be done or you could try the full version of the pose. Take a few sacrum circles and then Little Bridge Pose to bring back stability.

This posture was super hard for me at first. I thought I had knee trouble but it turned out it was just tight quads. After a few months of practicing this posture regularly - starting with the Restorative style supported Hero's and eventually working to the Yin style Hero's - my knee discomfort has gone away.

Monday, July 11, 2011

Supported Reclining Hero's Pose ~ Supta Virasana

Enjoy Supported Reclining Hero's Pose

Hero's Pose can be a very tricky posture to come into for anyone with knee issues, tight quads or low back/SI joint problems. Luckily, with props, this posture can be made available to most people--comfortably--not just to "get through it."

Setting up for the pose:
Gather a number of different props: a few pillows/bolsters, a few blankets, and a couple of blocks. Test your ability to sit on your shins with your bum on the floor between your feet. If this does not happen for you in an upright, seated position, it is not going to happen in the reclining version either. You need support.

Set up a bolster or a thickly-rolled blanket behind you lengthwise. Place a block, bolster, or additional pillows under the end of the bolster where your head is going to lay to create a ramp set-up. Like so:

This bolster set-up is good for Reclining Hero's Pose or for Reclining Bound Angle.

Coming into the pose:
Sit in Dandasana (sit on your bum with legs straight) in front of your bolster ramp. Get very close to your props - let your back body touch the bolster. Bend one leg and tuck your foot by your outer hip. Carefully lower your body toward your bolster ramp, coming into Supported Reclining Half Hero's Pose.


If this feels ok and you want to go for full Supported Reclining Hero's Pose, come back to seated and tuck your other foot next to your other hip and repeat the careful laying down process.


If your knees are saying "NO WAY" then you need more propping. Give yourself something to sit on - like a folded blanket or a small bolster and make your bolster ramp higher. With these modifications, most folks should be able to do this pose. I've only ever had one student who absolutely could not do it.

While in the pose:
Keep breathing, keep observing the pose in your body, and allow the body to open at its own rate. Commit to the stillness but do allow yourself to adjust your props and your body as you settle deeper in. Notice if you are gripping the knees, quads, hips or back (or of course the usual places like the jaw, forehead or shoulders). Try to let these parts soften. Stay as long as you are comfortable.

Coming out of the pose:
To come up, support the torso with the hands on the floor, and either push yourself to a seated Hero's Pose or roll to one side slightly and untuck your feet, one at a time. If you were practicing 1/2 Hero's take the 2nd side. After the second side you can be done or you could try the full version of the pose.

This posture is great for creating length in the quads. There may be discomfort in the knees to start but by lengthening the quads this problem can go away - at least for me it did. However, if the knee discomfort is sharp, stabbing or causes you to hold your breath, I would recommend doing this pose only with supervision.

Happy Exploring!

Monday, June 27, 2011

Supported Reclining Bound Angle

Blanket-foot Bound Angle

I've detailed other versions of Bound Angle and Reclining Bound Angle before (here and here). But this version is one of my favorites. It's easy to do at home or at yoga class. All you need are two medium-thick or thick blankets (three if you want one more to cover up with).

Setting up for the pose:
Roll one of your blankets into a small bolster and place it behind you lengthwise. It should be long enough to support your whole torso and your head. The blanket roll should be right up against your sacrum and when you lay on it your head should not be hanging off the end.

Fold your second blanket into a hotdog fold (fold in half lengthwise) and lay it down at the end of your mat by your feet (perpendicular to your mat).

Coming into the pose:
Sit in front of your bolster-rolled blanket with bent knees and your feet on your hotdog folded blanket. Fold the "hotdog folded" blanket over your feet making a "foot sandwich." (Now your blanket is folded twice, lengthwise, with your feet inside).


Pull the ends of your foot blanket toward you, tucking the feet in snugly.


Lay down on your bolster-rolled blanket and get comfortable. Your behind should be on the floor but the rest of your back and your head should be on the blanket roll. Let your knees fall open to the sides, tucking the ends of your "foot sandwich" blanket under your knees and/or hips to support the bound angle opening.


While in the pose:
You can experiment with what feels the best to you. If your head is tipped way back or you feel unsupported in the neck, place a folded blanket under the head and neck - not so thick that your head tips forward. Your head should be level with the body or slightly tipped back.

If your inner thighs feel too stretched, wad up your support blanket a little more and give your knees more height.

Send your arms out to the sides, palms up to encourage the heart center to open. If you feel too much pulling across the chest or through the arms, put a folded towel or blanket under each lower arm, supporting all the way to the fingertips.

If any other place in your body feels uncomfortable or unsupported, experiment with more props until you feel at ease.

Keep breathing, keep observing the pose in your body, and allow the body to open at its own rate. Commit to the stillness but do allow yourself to adjust your props and your body as you settle deeper in.

Coming out of the pose:
To come out, you can either help the knees come back together or you can send your legs straight out to stretch. Either way, roll to one side to rest before coming back to seated. A nice follow-up pose is a Supported Side Reclining Twist.

Enjoy!

Thursday, April 28, 2011

Restorative and Yin at the YMCA

I subbed or "guest taught" at the YMCA last night and had a lovely time. It was great to see so many of my former students (and meet new students too). The Y is finally done with their renovations and the new Mind-Body room (yoga room) is very nice. Quiet, meditative, and nice paint colors.

I subbed for Thomas's Yin class but of course my style of Yin is more like Yin-Therapeutic-Restorative so I'm sure it seemed like a very different class for folks who are not used to my teaching style.

I started everyone off in Legs-up-the-Wall,

added in a #4 hip stretch 

and then flowed into Hand-to-big-toe at the wall.

From there we scooted ourselves off the wall 
so we could take in Supported Bridge Pose with a quad stretch.

Some folks did 1/2 Hero's Pose (reclining) instead of Supported Bridge with quad stretch (same effect - just using a block or not).

We rested in Child's Pose but added in Yoga Mudra (hands clasped behind the back, roll onto the crown of the head and let hands reach towards the floor over the head (sorry no image for that one yet).

Our final active pose was a true Yin lunge - 
low, deep and long-held.
This image is from Camp Amnicon Winter Reflection Retreat 2010.
 I let everyone do their own thing for a few minutes and then we finished with final relaxation.

Being the non-traditional teacher that I am, I encouraged everyone to find their own final pose, whether it was Savasana, Reclining Bound Angle, laying on their belly, or whatever. 

It was lovely to see everyone at the Y. The class has really grown.

Monday, October 25, 2010

On Solid Ground ~ Part VIII

Here's the sixth and final of the Restorative poses from Yoga Journal's article (Winter 2010 - link at bottom of page).

Reverse Savasana (Corpse Pose), variation

By Karen Macklin
Sequence by Jillian Pransky

This reversed variation can feel more secure for someone who feels vulnerable in Savasana. Lie on your belly. Turn your head to the right. Bring your arms out to the side, elbows bent. Take your right knee out to the side. If needed, place a blanket for cushioning and support under the right arm, knee, thigh, belly, or all four. Cover your entire body with a blanket, including the exposed soles of your feet. After a couple of minutes, turn your head to the other side and switch the position of the knees. Stay here 5 to 10 minutes, releasing your whole front body into the ground.


Sara's Note: This is the last pose in the sequence. If you would like to read the entire article at Yoga Journal's website click here. I love how many blankets and bolsters have been used in this sequence. The more comfortable you can make yourself, the more your body can soften. Enjoy.


Friday, October 22, 2010

On Solid Ground ~ Part VII

Here's the fifth of the Restorative poses from Yoga Journal's article (Winter 2010 - link at bottom of page).

Savasana (Corpse Pose)

By Karen Macklin
Sequence by Jillian Pransky

Savasana can be a very expansive pose, especially when done with the legs wide apart and the arms away from the side body. Keeping the legs and arms a little closer to the body encourages a more contained feeling.

Roll up a blanket and place it alongside a wall. Lie down with the soles of your feet against the blanket. Place an additional rolled blanket or bolster under your knees to encourage the thighbones to drop deeper into your pelvis. This helps release tension in the iliopsoas and allows the pelvis to rest more heavily on the ground. Place a folded blanket over your belly to release tension and weigh the hips down even more. Rest your arms by your sides.

If your upper back and shoulders are rolled toward your heart and don't rest heavily on the floor, fill in the space with towels or blankets so you feel firm support all the way up the torso to the neck and head. Support your cervical curve with a small rolled towel and place a folded blanket under the head to create a cradling effect. Your chin should be perpendicular to the floor, and your throat should feel open and tension free. With each exhalation allow the earth to fully hold each part of your body: your heels, thighs, pelvis, upper back, and head. Once you feel completely connected to the ground, rest your mind on the waves of your breath. Stay in the pose for 5 to 15 minutes.

Sara's Note: Stayed tuned for more poses or, if you would like to read the entire article at Yoga Journal's website click here. Next pose is Reversed Savasana (Final Resting Position, alternate).

Wednesday, October 20, 2010

On Solid Ground ~ Part VI

Here's the fourth of the Restorative poses from Yoga Journal's article (Winter 2010 - link at bottom of page).

Side-Lying Savasana and Jathara Parivartanasana (Side-Lying Corpse Pose and Revolved Abdomen Pose), variation

By Karen Macklin
Sequence by Jillian Pransky

Twists are generally good for the nervous system, but some twists can make breathing feel constricted, which can be anxiety provoking. This gentle, supported twist allows more room for the breath to come into the rib cage and belly.

Start by lying on your left side with your feet at a wall and your back against a bolster that is at least as high as your spine. Bend your right knee to 90 degrees and support your right knee and shin with a bolster or folded blankets so that the right leg is as high as the right hip; rest the sole of your left foot against the wall.

Next, place folded blankets under your top arm and hand to lift them to the height of your shoulder. Finally, tuck a folded blanket under your head and neck to lift your head in line with the spine. Rest here, in Side-Lying Savasana, for 2 to 5 minutes.

To move into the twist, roll your torso to the right over the bolster, keeping your right arm fully supported by it from shoulder blade to fingers. Your right hand should be no lower than the height of your right shoulder. If you have tightness in your shoulder or chest, try placing more support under your arm until your hand is higher than your shoulder. You should not feel a stretch, but rather as though your chest is open and your breath is fluid. Stay in the twist for 2 to 5 minutes. Repeat on the other side. 

Sara's Note: Stayed tuned for more poses or, if you would like to read the entire article at Yoga Journal's website click here. Next pose is Savasana (Final Resting Position).

Monday, October 18, 2010

On Solid Ground ~ Part V

Here's the third of the Restorative poses from Yoga Journal's article (Winter 2010 - link at bottom of page).

Supta Baddha Konasana (Supported Reclining Bound Angle Pose), variation

By Karen Macklin
Sequence by Jillian Pransky

Supta Baddha Konasana opens the whole front of the body: the pelvis, belly, heart, and throat. These are areas we instinctively protect, which is why a pose like this can leave one feeling exposed and vulnerable.

Place a block lengthwise under one end of a bolster to prop it up on an incline. Sit with your back to the short, low end of the bolster. Place a second bolster under your knees and bring your legs into Bound Angle Pose with the soles of your feet together. Wrap a blanket around your feet to create a feeling of containment. Place another folded blanket over the pelvis to create a feeling of insulation. Lie back on the bolster. Place supports under your arms so that they are not dangling and there is no feeling of stretch in the chest. Stay in the pose for 5 to 15 minutes.


Sara's Note: Stayed tuned for more poses or, if you would like to read the entire article at Yoga Journal's website click here. Next pose is Side-Lying Savasana and Jathara Parivartanasana (Side-Lying Corpse Pose and Revolved Abdomen Pose), variation.

Friday, October 15, 2010

On Solid Ground ~ Part IIII

Here's the second of the Restorative poses from Yoga Journal's article (Winter 2010 - link at bottom of page).

Salamba Balasana (Supported Child's Pose)

By Karen Macklin
Sequence by Jillian Pransky


Place blocks underneath the two ends of a bolster and come into Child's Pose, with your torso supported by the bolster. It should feel as though the support is coming up to meet you rather than your torso dropping into the support. Slide your arms underneath the gap between the bolster and the floor, bringing each hand toward the opposite elbow. If the forearms or elbows don't touch the ground, fill in the space with towels or blankets so that you are supported from the elbows to the fingers.

Supporting the elbows and arms helps to release tension in the upper back and neck and to integrate the arms back into the body. In order to release tension in the lower back and create a deeper sensation of groundedness, place a heavy blanket on your sacrum. If the base of the shins or the tops of the feet are off the floor, prop them with a rolled-up towel.

Turn the head to one side, alternating sides halfway through the pose. On each inhalation, feel the back body expand; on each exhalation, feel the support under the chest and belly. Stay in the pose for 5 to 10 minutes. 

Sara's Note: Stayed tuned for more poses or, if you would like to read the entire article at Yoga Journal's website click here. Next pose is Supta Baddha Konasana (Reclining Bound Angle).

Wednesday, October 13, 2010

On Solid Ground ~ Part III

Here's the first of the Restorative poses from Yoga Journal's article (Winter 2010 - link at bottom of page). This pose reminds me very much of Legs-on-a-Chair.

Viparita Karani (Legs-up-the-Wall Pose), variation

By Karen Macklin
Sequence by Jillian Pransky

This pose is usually done with the legs extended all the way up the wall. Having the legs lower, with the feet against the wall, encourages grounding by creating a sensation of "standing" on the wall, as opposed to having the feet wide open to the sky.

Lie on your back with your calves and feet supported by either bolsters or blanket-covered blocks. Wrap or cover your calves with a blanket. Rest the soles of your feet against the wall. Place an additional folded blanket across the pelvis to help release tension there and to encourage the pelvis to rest more heavily on the ground. Rest your arms by your sides, either palms down or, if facing up, with an eye bag in each open palm. If your upper back and shoulders don't rest heavily on the floor, support them with towels or blankets. Place a folded blanket under your head.

You should feel firm support all the way up the torso, out through the arms, and up through the neck and head. Your throat should feel open and tension free. On each exhalation, allow the weight of your lower legs, pelvis, upper back, and head to be fully held. On each inhalation, allow your ribs to expand in all directions. Stay in the pose for 5 to 15 minutes.

Sara's Note: Stayed tuned for more poses or, if you would like to read the entire article at Yoga Journal's website click here. Next pose is Salamba Balasana (Supported Child's Pose).

Monday, September 27, 2010

Supported Lumbar Stretch

I learned this lumbar stretch from my teacher Susi Hately Aldous during one of the Therapeutic Yoga Trainings I have taken from her. I'm a bit of a hyper-extender so I was surprised that this pose would be good for me. What it does is lengthen your lumbar vs. kink it - which is a typical move for me in any kind of backbending posture. Here's how it works:


Step 1. Get yourself a felted pad or a firm blanket or even a big towel (like a beach towel) and make a roll that is about a handful for you. Sit on the tail of the blanket if you have extra.

Step 2. Lay down over the roll, supporting yourself on your elbows to ease your body down.

Step 3. As you lay down, lift your seat up so you are in a tiny bridge pose. Adjust your roll so it is at your waist - not your sacrum). You know if it is in the right place if it is centered behind your bellybutton.

Step 4. Now start to lower your seat towards the floor, arching your spine over the roll. When you settle your seat your back should feel like "Ahhhh" not "Ow, ow, ow." You should not look over arched. Your belly is not raised by the roll under your back. If you are not comfortable, lift your seat (into little bridge again) and make your roll smaller until your back is happy. Conversely, if you feel nothing, you will need to lift your seat into little bridge and make your roll a little bigger.

Step 5. Lay here for 5-10 minutes or until you are feeling done.


Enjoy!

Tuesday, June 15, 2010

Yoga for Chronic Pain

Kelly McGonigal wrote an article for Do Restorative Yoga back in December 2009. Here's another article by her from Yoga + Joyful Living magazine. The entire article is quite long so I am excerpting the part specific to Restorative Yoga. If you are interested in reading the whole article visit Yoga +.

Yoga for Chronic Pain
By Kelly McGonigal

 Most chronic pain has its roots in a physical injury or illness, but it is sustained by how that initial trauma changes not just the body but also the mind-body relationship. The complexity of chronic pain is actually good news. It means that trying to fix the body with surgeries, pain medications, or physical therapy is not your only hope. By first understanding chronic pain as a mind-body experience and then using yoga’s toolbox of healing practices—including breathing exercises and restorative poses—you can find true relief from pain and begin to reclaim your life.

The Protective Pain Response
Understanding the difference between acute pain and chronic pain will be critical to your ability to reduce and manage your pain. Let’s begin by examining the basic steps of the pain response: sensation, stress, and suffering.

The protective pain response begins when the body experiences some physical threat, such as a cut, a burn, or an inflamed muscle. This threat is detected by specialized nerves and sent through the spinal cord and up to the brain where, among other things, the threat signals are transformed into pain sensations. Emotion-processing areas of the brain also get the message, triggering a wide range of reactions, from fear to anger. Combined, your thoughts and emotions about the physical sensations of pain make up the suffering component of the full pain experience. Any kind of injury or illness, even one that is short-lived or appears to be fully healed, can change the way the nervous system processes pain.

Pain Again
Through the repeated experience of pain, the nervous system gets better at detecting threat and producing the protective pain response. So unfortunately, in the case of chronic pain, learning from experience and getting “better” at pain paradoxically means more pain, not less.

What you practice, you become. Learning is lifelong, and none of the changes you’ve learned have to be permanent. Your mind and body have learned how to “do” chronic pain, and your job is to teach it something new.

Unlearning Pain Through Relaxation
The best way to unlearn chronic stress and pain responses is to give the mind and body healthier responses to practice.

By helping you transform chronic pain-and-stress responses into “chronic healing” responses of mind and body, yoga helps reduce your suffering of chronic pain. Your mind and body have built-in healing responses that are just as powerful as their protective pain-and-stress responses. Relaxation specifically has been shown to be healing for chronic pain. It turns off the stress response and directs the body’s energy to growth, repair, immune function, digestion, and other self-nurturing processes. Consistent relaxation practice teaches the mind and body how to rest in a sense of safety rather than chronic emergency.

Restorative Yoga
Restorative yoga turns on the healing relaxation response by combining gentle yoga poses with conscious breathing. There are several factors that make restorative yoga so relaxing. First, each pose is meant to be held for longer than a few breaths. You can stay in a restorative pose for 10 minutes or even longer. The stillness allows the body to drop even the deepest layers of tension. Second, restorative poses use props to support your body. Props can include the wall, a chair, a couch, pillows, blankets, towels, or bolsters designed especially for restorative yoga practice. The right support in a pose will make it feel effortless, so your body can fully let go.

You shouldn’t feel strong sensations of stretch or strength the way you might in a more active yoga pose. Stretching and strengthening, although healthy, are both forms of tension in the body. They are a kind of good stress on the body, asking the body to adapt to the challenges of a pose. But restorative yoga is all about letting go of tension and stress.

Although these poses may look as though you are doing nothing, this is far from the truth. Restorative yoga rests the body but engages the mind. The breathing elements of each pose make restorative yoga an active process of focusing the mind on healing thoughts, sensations, and emotions.

The order of poses presented here is just one possible sequence. As you explore the poses, you may find that your body prefers a different sequence or that you would rather stay longer in one pose than practice several poses for shorter periods. You can also integrate restorative poses into an active yoga session.

Nesting Pose


Nesting pose creates a sense of security and nurturing. It may also be a position you are comfortable sleeping in, making it an excellent posture to practice if you have insomnia or other difficulty sleeping.

Lie on your side, legs bent and drawn in toward your belly. Rest your head on a pillow, and place a pillow or a bolster between your knees. Rest your arms in whatever position feels most comfortable. If available, another bolster or pillow may be placed behind your back for an extra sense of support.

Rest in the natural rhythm of your breath, observing each inhalation and exhalation as it moves through the body. Take comfort in the simplicity and effortlessness of this action.

Supported Bound Angle Pose


This pose relaxes tension in the belly, chest, and shoulders that otherwise can restrict the breath. Lean a bolster on a block or other support (such as telephone books). Sit in front of the bolster with your legs in a diamond shape. Place a pillow or a rolled blanket under each outer thigh and knee, making sure that the legs are fully supported without a deep stretch or strain in the knees, legs, or hips. Lean back onto the bolster so that you are supported from the lower back to the back of the head. Rest your arms wherever is most comfortable.

Now notice the whole front of your body relax and gently open as you inhale. Follow this sensation and feel the ease in the front of the body as you breathe.

Supported Backbend Pose


Supported backbend is a heart-opening pose that reinforces your desire to embrace life and not let challenges—including pain—separate you from life. This pose also works magic to release chronic tension in the back and shoulders, undoing postural habits that come from spending too much time at a desk, at a computer, or driving.

Sitting, place a bolster or a stack of pillows or blankets under slightly bent knees. Place one folded pillow or rolled blanket or towel behind you; when you lie back, it should support the upper rib cage, not the lower back. If you need extra support underneath the lower rib cage and lower back, roll a small towel to support the natural curve of the spine. Place a rolled towel or a small blanket to support your head and neck at whatever height is most comfortable.

This pose improves the flow of the breath in the upper chest, rib cage, and belly. Allow yourself to feel this movement as you inhale and exhale. Imagine breathing in and out through your heart center. Visualize the movement of breath from your heart to your lungs as you inhale, and from the lungs back out through the heart center as you exhale.

Supported Forward Bend


This pose relaxes the hips and back, unraveling the stress of daily activities on the spine. Hugging a bolster and resting your head on its support provides a natural sense of security and comfort.

Sit cross-legged on the floor. Lean forward onto the support of a sofa, a chair, or a stack of pillows, blankets, or cushions. If you have a bolster, place one end in your lap and the other end on the sofa, the chair, or the stack of support. Rest your head on whatever support is available. If you are using the bolster, you can hug it in any way that feels comfortable, turning your head to the side. Be sure that whatever support you are using is high enough and sturdy enough to support you, without creating strain in the back or hips. If you feel a strong stretch that is uncomfortable to hold, you need more support.

In this pose, the belly, chest, and back all expand and contract with each breath. Feel the movement of the whole torso as you inhale and exhale. Feel your belly and chest gently press into the support of the bolster or pillows as you inhale. Let the sensation of your breath deepen the sensation of being hugged.

These simple relaxation practices will lead you on the path of ending your suffering. Yoga can teach you how to focus your mind to change your experience of physical pain. It can give you back the sense of safety, control, and courage that you need to move past your experience of chronic pain.

Kelly McGonigal is the editor in chief of the International Journal of Yoga Therapy.

This article is excerpted from her book, Yoga for Pain Relief: Simple Practices to Calm Your Mind and Heal Your Chronic Pain, which is now available at Amazon.com.

Sara's note: After Ms. McGonigal wrote for Do Restorative Yoga last year I have been noticing her name popping up all over the place: Yoga + and Yoga Journal to name a few. I've really been appreciating her approach to dealing with pain and I recommend that you follow this link to Yoga + and read the whole article. If you are interested in more articles from Yoga + Magazine visit their website to read archived articles or to subscribe.

Tuesday, May 25, 2010

Open your heart

This gentle heart-center opener will help you get rid of that hunched feeling you get after sitting all day.

Setting up for the pose:
The only prop you need for this pose is a therapeutic spinal strip. If you don't have one of these, you can use a swim noodle, a tightly rolled thin mat, or a tightly rolled towel. You might also need a folded blanket for under your head.

Coming into the pose:
Sit in front of your therapeutic spinal strip (swim noodle/rolled mat/rolled towel) and then lay down on it at about the bottom of the shoulder blades. You can experiment with what feels the best to you. If your head is tipped way back or you feel unsupported in the neck, place a folded blanket under the head and neck - not so thick that your head tips forward. Your head should be level with the body or slightly tipped back.

While in the pose:
Send your arms out to the sides, palms up to encourage the heart center to open. Keep breathing, keep observing the pose in your body, and allow the body to open at its own rate. Commit to the stillness but do allow yourself to adjust your props and your body as you settle deeper in. I like to lay with my knees bent but some of my students prefer to have their legs straight. See what feels right in your body.

Coming out of the pose:
To come out, bend the knees, roll to one side, pull the spinal strip out from underneath you, and then lay back down on your back. (Or lift up the hips to bridge pose to pull the Spinal strip out from under you.) Take a few sacrum circles or a full body stretch. A nice follow-up pose is a Supported Reclining Twist.

Enjoy!

Tuesday, May 18, 2010

Supported 1/2 Wide-Angle Pose - Upavistha Konasana

Enjoy Supported 1/2 Wide-Angle Forward Fold

1/2 Wide-Angle Pose looks very similar in set up to Head-to-Knee pose (Janu Sirsasana) as shown in the Yoga Journal image on the right, but instead of turning the torso to fold out over the leg, the body folds directly forward, hinging from the hips, as seen below. 1/2 Wide-Angle is easier on the inner thighs than the full version and can be used as a pose in its own right or as a warm up for Wide-Angle Pose.

Setting up for the pose:
Gather a number of different props: a chair, or a couple of blocks, or a few pillows/bolster, also, either a blanket for sitting on or else a wedge.

Coming into the pose:
Sit in front of your chair, block or bolsters with your legs open wide (about 90 degrees). Support your low back by sitting on a wedge or a folded blanket. Fold one leg in to the body so the soul rests on the inner thigh of the other leg and heel is drawing towards the perineum. Toes of the straight leg draw back toward the body and knee cap points toward the ceiling. Reach out through your heel. Hinge forward at the hip crease, walking your hands out and resting your forehead on the block, bolster or chair. If you are using a chair or bolster pile you can place your arms on the chair’s seat, hinge forward at the hip crease and rest your head on your forearms, keeping length in your spine.


While in the pose:
Keep breathing, keep observing the pose in your body, and allow the body to open at its own rate. Commit to the stillness but do allow yourself to adjust your props and your body as you settle deeper in. Watch the sit bones. They will want to creep up and often your body tries to tip more towards the folded leg. Don't let these two things happen.


Coming out of the pose:
To come up, support the torso with the hands on the floor, inhale and hinge or roll back up from the hips, protecting the spine. Take the 2nd side. After the second side you can be done or you could try the full version. Another nice follow-up pose is Bound Angle or Reclining Bound Angle.

Enjoy!

Monday, November 30, 2009

Supported Reclining Twist

Enjoy Supported Reclining Twist


Coming into the pose:
Lay on your back with your knees bent. Have a support ready on each side of your body. Shift your hips to one side and let your knees fall to the other side. Snuggle a bolster under your back hip and bum to support staying in the twist and let the stacked knees rest on a second bolster as they fall towards the floor. Try to keep the shoulders on the floor, keep the heart center open by extending the arms away from the body, palms facing up, and let the head turn away from the knees. Stay as long as you are comfortable.

Changing sides:
Let the head come back to center. Remove the support from under the back hip. Engage the core slightly to support the spine and then bring the legs back to upright, helping the legs with the hands if needed. Settle into the second side the same way as the first and try to stay here an equal amount of time.

Exiting the pose:
Let the head come back to center and then keep turning towards the knees. Remove the props from under the knees, lay on your side for a few breaths, and then gently push yourself back to an easy seated position.

If this twist is not to your liking try Supported Side Reclining Twist ~ Salamba Bharadvajasana.

Saturday, November 21, 2009

Supported Corpse Pose ~ Salamba Savasana

Enjoy Supported Savasana Pose


I always conclude my Restorative class with Supported Savasana. I encourage my students to go nuts and prop themselves in all the ways that would support their body's comfort. This picture only shows a bolster under the legs and an eye pillow but you can get really creative with supporting yourself.

Here's some ideas for increasing comfort and adding support (you don't have to do them all - but you could try for fun):
  • A small roll under the low back for lumbar support
  • A small roll under each wrist
  • A small roll under the neck and/or a pillow under the head
  • A small roll under the ankles
  • Add a sandbag over the pelvis to encourage the hip flexors to let go
  • Add a sandbag on each shoulder to encourage releasing tension
  • Add a sandbag over the diaphragm to increase breath awareness 
  • A blanket over the whole body to keep warm

I'm sure there are more tips and techniques out there but this is a great place to start. Stay in Supported Savasana for as long as you like, encourage the mind to focus on the breath: the feeling of the breath in the body, where the breath is in the body, where can't the breath get to in the body, the feeling of the breath entering and leaving the nostrils or the feeling of the breath bellowing the belly and the belly falling back into the body on each inhale and exhale. Let the mind settle into breath awareness as the body settles into stillness.

Enjoy!

Read more about Savasana here.

Monday, November 9, 2009

Supported Wide-Angle Fold ~ Upavistha Konasana

Enjoy Supported Wide-Angle Forward Fold

Wide leg forward fold can be done from a standing position or seated. Generally for my Restorative class we are seated and have multiple props to support this sometimes difficult opening.

Setting up for the pose:
Gather a number of different props: a chair, or a couple of blocks, or a few pillows/bolster, also, either a blanket for sitting on or else a wedge.


Coming into the pose:
Sit in front of a chair, block or bolsters with your legs open wide (about 90 degrees). Support your low back by sitting on a wedge or a folded blanket. Toes draw back toward the body and knee caps point toward the ceiling. Reach out through your heels. Hinge forward at the hip crease, walking your hands out and resting your forehead on the block, bolster or chair. If you are using a chair or bolster pile you can place your arms on the chair’s seat, hinge forward at the hip crease and rest your head on your forearms, keeping length in your spine.

While in the pose:
Keep breathing, keep observing the pose in your body, allow the body to open at its own rate. Commit to the stillness but do allow yourself to adjust your props and your body as you settle deeper in.

Coming out of the pose:
To come up, bring the hand to the floor to support the torso, inhale and hinge or roll back up from the hips, protecting the spine.

Enjoy!