At class or at home, this sequence will relax you.
Begin by sitting next to a wall, roll onto your back and swing your legs up the wall. Really let yourself settle in here. Become aware of your breath, let your mind settle down, let all tension melt away.
Legs up the Wall ~ Viparita Karani

If you would like to add a little more movement to Legs up the Wall you can add the #4 Hip Stretch. Make sure to stretch both hips.
Legs up the Wall w/ #4 Hip Stretch

Stay here about 5-10 minutes. For more information about Legs up the Wall Pose click here.
From Legs up the Wall pose, hug your knees in to your chest, roll over and transition to Supported Child's Pose. Get a bolster, pile of pillows or stack of blankets and lay down in Child's Pose, supporting your torso with the props.
From Legs up the Wall pose, hug your knees in to your chest, roll over and transition to Supported Child's Pose. Get a bolster, pile of pillows or stack of blankets and lay down in Child's Pose, supporting your torso with the props.
Supported Child's Pose ~ Salamba Balasana

Stay here about 5-10 minutes making sure to take equal time turning your head in each direction. For more information about Supported Child's Pose click here.
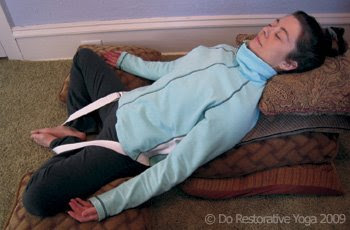
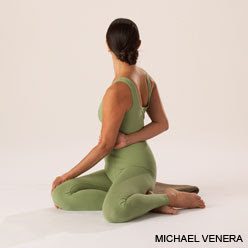
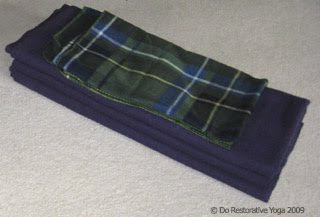
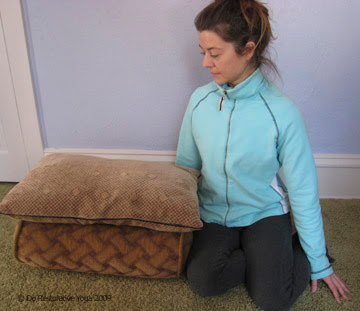
After Child's Pose, move into a Supported Side Reclining Twist. For full support make sure that the bolster / blankets are right up against your thigh before you lay down. Height of your bolster is determined by length of torso. For example, a more petite person may only need 2 folded blankets, whereas a longer waisted person might need 3-4 folded blankets and possibly an extra one to raise their head.
Supported Side Reclining Twist ~ Salamba Bharadvajasana

Stay here about 5-10 minutes per side or for as long as it is comfortable for you. For more information about Supported Side Reclining Twist click here.
After Supported Side Reclining Twist, roll on to your back, lift your hips, slide a block under your sacrum and settle in to Supported Bridge Pose. If you want to use the belt to support your legs, put it on before putting the block under your sacrum.
Supported Bridge Pose ~ Salamba Setu Bandha Sarvangasana
 Stay here about 5-10 minutes. To come out, lift the hips, slide the block out, roll down and hug the legs into the chest. For more information about Supported Bridge Pose click here.
From Supported Bridge, roll to one side and ease your way back to seated to prepare for Supported Bound Angle Pose. Sit on a wedge or folded blanket to lift the hips, extend the legs in front of you then bring the soles together, draw them in to the body and let the knees fall apart. Use your prop pile, a block, or a chair to rest your forehead on.
Supported Bound Angle Pose ~ Salamba Baddha Konasana
 Stay here about 5-10 minutes, allowing the body to move deeper into the pose slowly. Move your props as your body opens. For more information about Supported Bound Angle Pose click here.
After Supported Forward Folding Bound Angle set your prop pile up behind you to take Reclining Bound Angle. You can use a belt to hold your legs into your body and it is also nice to have a pillow or block under each knee. Rest back on your prop pile, draw your feet in towards your body, let your knees fall open and settle in.
Reclining Bound Angle ~ Supta Baddha Konasana

Stay here 10 minutes or more, allowing the body to move deeper into the pose slowly. Move your props as your body opens. For more information about Supported Reclining Bound Angle Pose click here.
You can finish up your sequence with Supported Savasana. Lay on your back and use any props you need to be as comfortable as possible. Perhaps a pillow under the knees or under the head, maybe a blanket over your body, an eye pillow or a sandbag on the belly - anything that brings you into greater comfort. Rest here, keeping your mind focused on the breath. Stay as long as you want.
For more information on Restorative Yoga visit Do Restorative Yoga's website or blog. Namaste.


