


For more photos, visit my public album on Facebook: Click Here.

 For details on how to do this pose click here.
 For details on how to do this pose click here.
 Details on how to do this pose here.
 |
| Make sure to take the twist in both directions. |
 |
| Tight hamstrings? No problem. Just use more props. |
 While in the pose:
 |
| Instead of a block, you could use a chair so your fold is not too deep. |

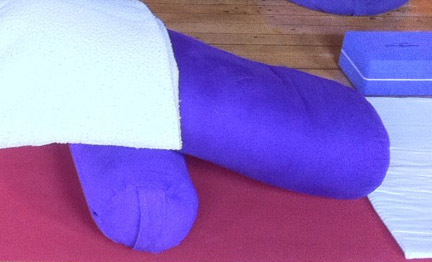 |
| This bolster set-up is good for Reclining Hero's Pose or for Reclining Bound Angle. |


The poses in this sequence are designed to give you the experience of being cradled and protected while providing the opportunity for deep relaxation and rejuvenation. When you're practicing them for the first time, it can be helpful to have a friend assist you in setting up the props. Warm up with a few rounds of Cat-Cow Pose, or any other gentle poses that help you connect with your breath. Once you're propped and positioned, take the first few minutes in each pose to sense where you connect with the floor or the props. What part of your body rests most heavily on the support underneath you? Let this area be like an anchor rooting you to the earth. Slowly allow this sense of connection to spread to all the areas where you meet the ground and the props.
When your body feels completely supported, let your attention turn toward your breath. Like an ocean wave, each breath will rise and fall on its own. Rest your mind on the tide of your breath. Throughout each pose, let your attention move back and forth between the earthlike qualities of your body and the fluidlike qualities of your breath.
Stay in each pose for up to 15 minutes. Even a few minutes will make a difference. If you feel restless but want to stay in the pose, you can do small vinyasa movements with your hands to help yourself settle down: Roll your open palms to the sky as you inhale; roll them back to the ground as you exhale.
Viparita Karani (Legs-up-the-Wall Pose), variation
This pose is usually done with the legs extended all the way up the wall. Having the legs lower, with the feet against the wall, encourages grounding by creating a sensation of "standing" on the wall, as opposed to having the feet wide open to the sky.
Lie on your back with your calves and feet supported by either bolsters or blanket-covered blocks. Wrap or cover your calves with a blanket. Rest the soles of your feet against the wall. Place an additional folded blanket across the pelvis to help release tension there and to encourage the pelvis to rest more heavily on the ground. Rest your arms by your sides, either palms down or, if facing up, with an eye bag in each open palm. If your upper back and shoulders don't rest heavily on the floor, support them with towels or blankets. Place a folded blanket under your head.
You should feel firm support all the way up the torso, out through the arms, and up through the neck and head. Your throat should feel open and tension free. On each exhalation, allow the weight of your lower legs, pelvis, upper back, and head to be fully held. On each inhalation, allow your ribs to expand in all directions. Stay in the pose for 5 to 15 minutes.
Salamba Balasana (Supported Child's Pose)
Place blocks underneath the two ends of a bolster and come into Child's Pose, with your torso supported by the bolster. It should feel as though the support is coming up to meet you rather than your torso dropping into the support. Slide your arms underneath the gap between the bolster and the floor, bringing each hand toward the opposite elbow. If the forearms or elbows don't touch the ground, fill in the space with towels or blankets so that you are supported from the elbows to the fingers. Supporting the elbows and arms helps to release tension in the upper back and neck and to integrate the arms back into the body. In order to release tension in the lower back and create a deeper sensation of groundedness, place a heavy blanket on your sacrum. If the base of the shins or the tops of the feet are off the floor, prop them with a rolled-up towel.
Turn the head to one side, alternating sides halfway through the pose. On each inhalation, feel the back body expand; on each exhalation, feel the support under the chest and belly. Stay in the pose for 5 to 10 minutes.
Supta Baddha Konasana (Reclining Bound Angle Pose), variation
Supta Baddha Konasana opens the whole front of the body: the pelvis, belly, heart, and throat. These are areas we instinctively protect, which is why a pose like this can leave one feeling exposed and vulnerable.
Place a block lengthwise under one end of a bolster to prop it up on an incline. Sit with your back to the short, low end of the bolster. Place a second bolster under your knees and bring your legs into Bound Angle Pose with the soles of your feet together. Wrap a blanket around your feet to create a feeling of containment. Place another folded blanket over the pelvis to create a feeling of insulation. Lie back on the bolster. Place supports under your arms so that they are not dangling and there is no feeling of stretch in the chest. Stay in the pose for 5 to 15 minutes.
Side-Lying Savasana and Jathara Parivartanasana (Side-Lying Corpse Pose and Revolved Abdomen Pose), variation
Twists are generally good for the nervous system, but some twists can make breathing feel constricted, which can be anxiety provoking. This gentle, supported twist allows more room for the breath to come into the rib cage and belly.
Start by lying on your left side with your feet at a wall and your back against a bolster that is at least as high as your spine. Bend your right knee to 90 degrees and support your right knee and shin with a bolster or folded blankets so that the right leg is as high as the right hip; rest the sole of your left foot against the wall. Next, place folded blankets under your top arm and hand to lift them to the height of your shoulder. Finally, tuck a folded blanket under your head and neck to lift your head in line with the spine. Rest here for 2 to 5 minutes.
To move into the twist, roll your torso to the right over the bolster, keeping your right arm fully supported by it from shoulder blade to fingers. Your right hand should be no lower than the height of your right shoulder. If you have tightness in your shoulder or chest, try placing more support under your arm until your hand is higher than your shoulder. You should not feel a stretch, but rather as though your chest is open and your breath is fluid. Stay in the twist for 2 to 5 minutes. Repeat on the other side.
Savasana (Corpse Pose)
Savasana can be a very expansive pose, especially when done with the legs wide apart and the arms away from the side body. Keeping the legs and arms a little closer to the body encourages a more contained feeling.
Roll up a blanket and place it alongside a wall. Lie down with the soles of your feet against the blanket. Place an additional rolled blanket or bolster under your knees to encourage the thighbones to drop deeper into your pelvis. This helps release tension in the iliopsoas and allows the pelvis to rest more heavily on the ground. Place a folded blanket over your belly to release tension and weigh the hips down even more. Rest your arms by your sides, palms facing down.
If your upper back and shoulders are rolled toward your heart and don't rest heavily on the floor, fill in the space with towels or blankets so you feel firm support all the way up the torso to the neck and head. Support your cervical curve with a small rolled towel and place a folded blanket under the head to create a cradling effect. Your chin should be perpendicular to the floor, and your throat should feel open and tension free. With each exhalation allow the earth to fully hold each part of your body: your heels, thighs, pelvis, upper back, and head. Once you feel completely connected to the ground, rest your mind on the waves of your breath. Stay in the pose for 5 to 15 minutes.
Reverse Savasana (Corpse Pose), variation
This reversed variation can feel more secure for someone who feels vulnerable in Savasana. Lie on your belly. Turn your head to the right. Bring your arms out to the side, elbows bent. Take your right knee out to the side. If needed, place a blanket for cushioning and support under the right arm, knee, thigh, belly, or all four. Cover your entire body with a blanket, including the exposed soles of your feet. After a couple of minutes, turn your head to the other side and switch the position of the knees. Stay here 5 to 10 minutes, releasing your whole front body into the ground.
December 2009


